
This is the boring part, at least it is for me. I’m always one who wants to get to the meat of a task. Prep and cleanup are the worst bits of it, but I’ve (finally) learned that they’re as important to a process as the doing is. Now if only there was a way to go back in time and tell that to my younger art student self…
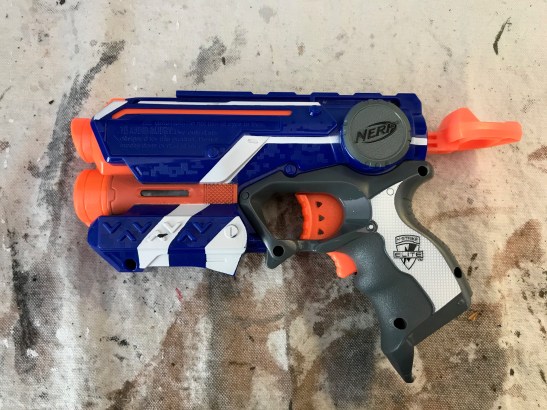
So it doesn’t look like I’ve gotten very far. I started from here:
And I’ve gotten here:

I know, it doesn’t look like a lot, but that is probably somewhere around ten hours or so of work. Keep in mind, I’m working full time, doing edits on my current manuscript, DMing a twice-monthly DnD game, while also trying to be a good wife and step-mom. The progress isn’t going as quickly as I’d like, but it’s coming.
So how did I get to my after picture?
Much of that ten hours was spent on sanding. I decided that I wanted to not only get rid of all the Nerf logos and messaging, but also the weird bits of texture. I kept a little bit of it, but most of that went. I bent myself to my task armed with big files, medium files, needle files, and many grits of sanding blocks and paper. I’d thought I could just sand away what I didn’t want with my Dremel, but I quickly learned that it was doing a better job of melting the plastic than it was removing it, so I had to apply myself manually.
That was…time-consuming. Also mind-numbing. And gave me some interesting blisters. I knocked back the major stuff, then took the pistol apart to get access to certain areas.
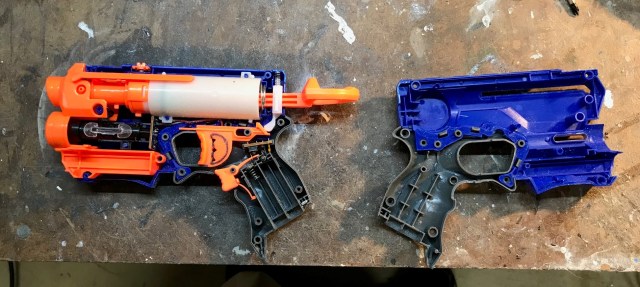
I took the photo mostly so I’d be able to put the whole thing back together.
I’d had the idea that I would trim down the trigger, but after seeing how it went together, I decided not to mess with the structural integrity of that mechanism too much. I did fill in the weird holes in the plastic with Bondo (more sanding). I then clipped off the dart priming mechanism, and pulled apart all the orange pieces so I could prep them for paint.
And did that include more sanding? Of course it did! Apparently Nerf plastic doesn’t take paint well, so everything needs to be sanded to prepare the surface for priming. In my after photo, you’ll notice most of the orange bits are now black. The currently remaining orange plastic is going to be covered up as part of the mod.
While the paint dried, I sanded the body of the gun, working my way through progressively finer grits of sand paper, mostly to get rid of the worst of the file marks. It doesn’t sound like much on paper, but it took a LONG time.
After all of that prep, I decided I wanted to actually make something, dammit! So I started on the little bayonet. And I was so excited that I forgot to take process photos.

You can see in the photo how it’s constructed. I have a piece of plastic (Sintra) in the middle for some structure. The bulk of the construction is EVA/craft foam. I built it using blueprints I created using Inkscape (yes, more prep).
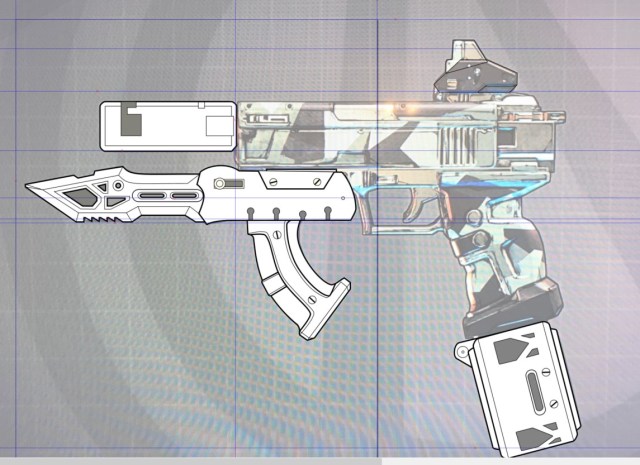
Most of my builds start with the blueprint before I ever step foot in the shop. This one is a little different because I could start with physically prepping the gun, and I only have to create the blueprint for each piece, and not the whole thing. The bayonet was an even better place to start as I really only needed one side.
Basically, I printed out the blueprint, then used is as a template to cut out foam, which I glued to the plastic base of the bayonet. I then beveled it to create the blade and insane cutouts. Stabilizing those edges with crazy glue after the fact was hugely helpful in stabilizing the pretty fragile edges. That part of the build was only a couple of hours. Now the bayonet lives in a large coffee tin so my cat with the appetite for EVA foam doesn’t chew large holes into it. Once it’s painted, he won’t be interested, but until then, all foam items have to be locked up. One day I’ll post a picture of my foam protection measures.
At that point, it was back to prepping the pistol. Everything was sanded down to where I wanted it, so I put it all back together. Everything still fit, and it went together perfectly on the second try. I gave a quick mental thank you to past me for thinking to take that picture, and screwed everything down. Then I mixed up a small bit of Apoxie Sculpt and plugged the screw holes.
The holes aren’t quite flush, which I did on purpose. This is where I left it for the day, as the Apoxie Sculpt takes three hours to completely harden. However, I still need to Bondo those holes and the seams, then sand (yay!) it all back down. After that, it’s make some modifications to the gun to fix the hole in the back where I removed the priming thingamajig, build a new cap at the bottom of the grip, and fill the dart storage holes at the front (not visible in this photo). Then it’s build more pieces!!!
I’m reasonably pleased with my progress, I just wish there wasn’t so much boring crap to get through before the fun part begins. I also wish I’d remembered to take those progress pics. More next time, I promise!
